major-gnuisance.github.io
Major Gnuisance's Github Pages
Project maintained by major-gnuisance Hosted on GitHub Pages — Theme by mattgraham
Gyro Revolution for Half-Life 2
by Major Gnuisance
Table of Contents
- Introduction
- Resource summary
- Installation, summarized
- Installation, detailed
- Removal
- Controls
- Feature List
- Bugs/Problems
- Possible Improvements
- Changelog
- Acknowledgments
- Contact
Introduction
This page will help you set up and use my Steam Input configuration to play Half-Life 2 with a DualShock 4 controller.
Here’s some footage of what playing with this looks like:
Follow either the summarized or detailed Installation section to set everything up, then check out the Controls section details to see how this control scheme works exactly.
Resource summary
- Custom cfg file: gyro_revolution.cfg
- Icon pack: HL2_TouchMenuIcons.zip
- Controller Configuration
- v1.1 URLs:
- Half-Life 2: steam://controllerconfig/220/2083662274
- Half-Life 2 Episode 1: steam://controllerconfig/380/2083662274
- Half-Life 2 Episode 2: steam://controllerconfig/420/2083662274
- VDF file for manual import: gyro_revolution_hl2_v1.1.vdf
- v1.1 URLs:
Installation, summarized
- Extract icon pack into game’s directory (
Half-Life 2) - Put
gyro_revolution.cfgunder thehl2/cfg/directory- For Episodes 1 and 2, put it in the
episodic/cfg/directory
- For Episodes 1 and 2, put it in the
- Add a line with
exec gyro_revolutionto yourautoexec.cfgfile in the same directory (hl2/cfg/orepisodic/cfg/). You can use this autoexec.cfg if you don’t have one. - Connect DS4 controller
- Enable PlayStation Configuration Support in Big Picture, if not already enabled
- Import my controller configuration (link above)
- (Linux only) Remove the file at
<GAME_DIRECTORY>/bin/libSDL2-2.0.so.0
Installation, detailed
- Install icon pack and custom configuration file
- Open the game’s directory
- Right click game in Steam library > Manage > Browse local files
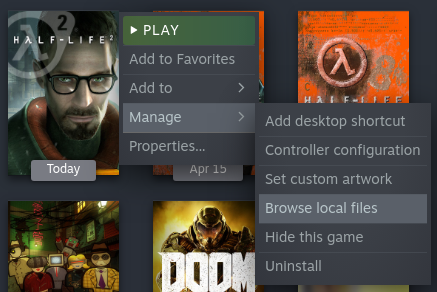
- Right click game in Steam library > Manage > Browse local files
- Extract the Icon Pack zip there. You should now have a
TouchMenuIconsdirectory. - Enter the
hl2/cfg/directory and place the gyro_revolution.cfg and autoexec.cfg files there.- For Episode 1 and Episode 2, use the
episodic/cfg/directory instead. - If you already have an
autoexec.cfgfile, you can edit it and add a line with following text:exec gyro_revolution
- For Episode 1 and Episode 2, use the
- (OPTIONAL) Make a backup of your
config.cfgfile, should you want to restore it later.
- Open the game’s directory
- Connect your DualShock 4 to your computer. Either:
- Wired, using a micro USB cable
- Wireless, using Bluetooth
- With the DualShock 4 turned off, hold SHARE and the PS button to enter Bluetooth pairing mode, then pair it with the computer.
- Enable DualShock 4 configuration support in Steam’s Big Picture mode
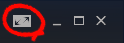
- Start Big Picture by clicking the button to the left of the “minimize” button in Steam
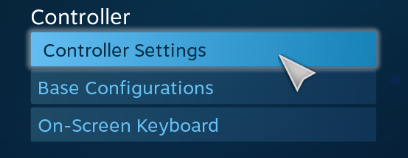
- Go to Setting > Controller Settings

- Check “PlayStation Configuration Support” box

- Select your controller under “Detected Controllers” and then click Calibrate


- Tune your joystick deadzones if necessary
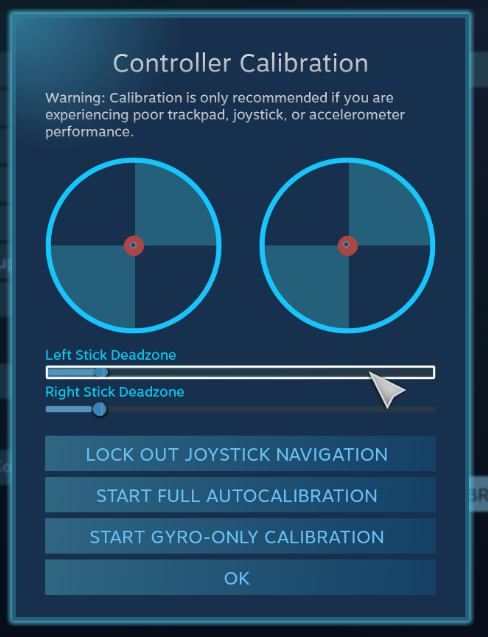
- Place the controller on a stable, level surface and click “Start Gyro-Only Calibration.”
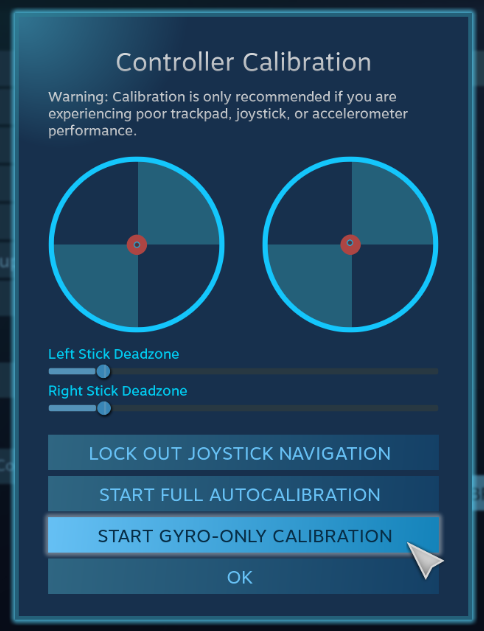
- Make sure the controller stays completely still until the calibration is done (about 5 seconds).
- Start Big Picture by clicking the button to the left of the “minimize” button in Steam
- Import my configuration
- Click the links below to open the configuration in Steam. Choose the one for the game you want.
- This screen should appear:
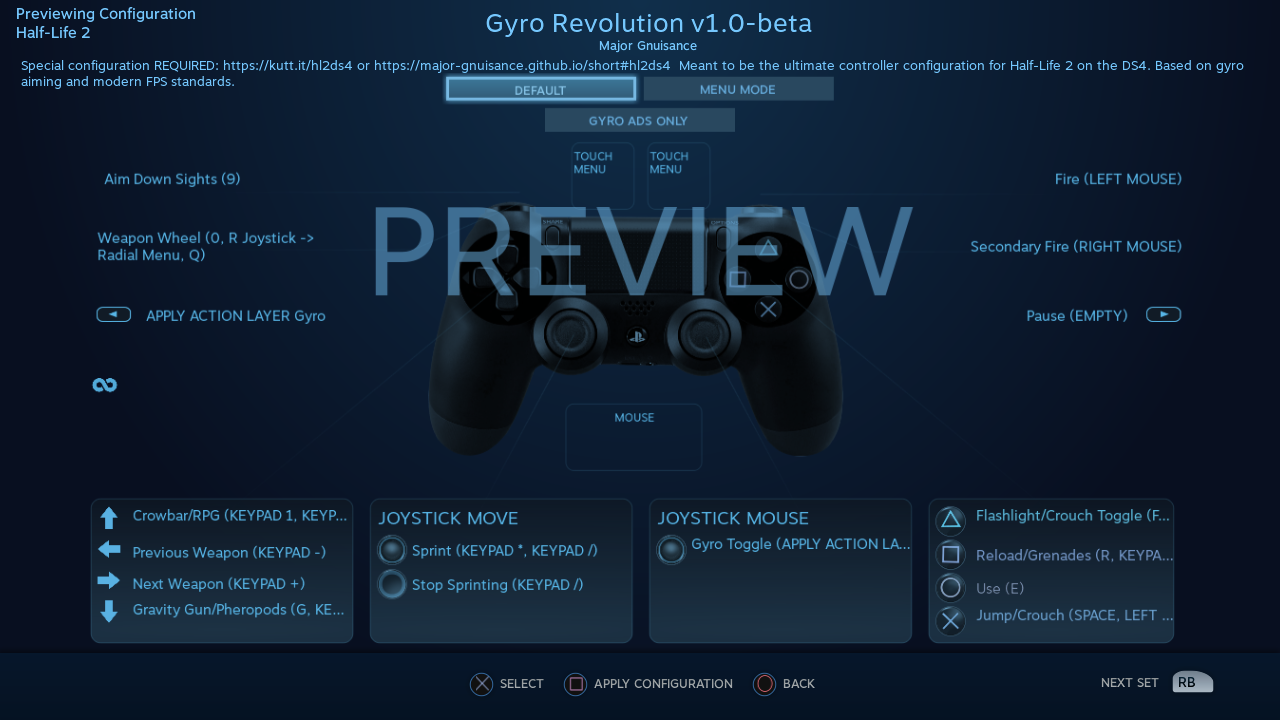
- Press
 to apply, then
  to exit
- (Linux only) Remove the
libSDL2-2.0.so.0file in the game files, under thebin/directory. It’s outdated as of this writing (2020-05-03) and it can cause double input problems. The version included in the Steam Runtime works fine and will be used automatically instead. - Play the game!
Removal
- Remove the
exec gyro_revolutionline from yourautoexec.cfgfile - Delete
config.cfgand optionally restore a backup of it.
Controls
Basics
Use  and the gyroscope to move the camera.
It’s recommended to rely on the gyro to aim and for
broader motions.
The gyro is always on by default, but you can toggle it on and off
by clicking . It’s recommended to turn it off when
driving outside of combat.
Hold  to aim more precisely.
Gyro is always enabled when doing this.
Note: If the camera moves on its own you might be experiencing
gyro drift.
Try recalibrating the gyroscope as explained in the detailed
installation instructions if this happens.
Use  to move.
Click while moving to sprint.
You will stop sprinting when you return the stick to its neutral
position.
Tap  to jump.
Tap  to toggle crouch.
Press to use.
Hold to crouch while jumping, which may help extend your
reach, land tricky jumps or vault over obstacles.
Note: the game itself automatically crouch jumps in some
situations, usually next to boxes/windows/vents/etc. This is only
useful for more advanced moves.
Press  to pause.
| Action | Control |
|---|---|
| Move | |
| Sprint | click |
| Move Camera | Gyro |
| Move Camera (coarse) | |
| Toggle gyro | click |
| Jump | |
| Crouch-jump | (hold) |
| Toggle Crouch | |
| Use | |
| Pause | |
Weapons
Pull  for primary fire and press
  for secondary fire.
Tap to reload
Tap  to swap to your previously selected weapon.
Hold to bring up the Weapon Select Wheel and then select a weapon
with .
Due to usability constraints, not all weapons are in the selection wheel, but they have their own dedicated quick access buttons.
The following weapons have quick access buttons:
- Crowbar on

- Grenades on Hold and Hold
- Gravity Gun on
- Pheropods on Hold or icon in
 .
.
You can also browse and select from available weapons the
traditional way with  and
and  . Press
to confirm your selection.
. Press
to confirm your selection.
| Action | Control |
|---|---|
| Fire | |
| Secondary fire | |
| Reload | |
| Weapon Wheel | Hold + |
| Last Weapon | Tap |
| Previous/Next Slot | / |
| Crowbar | |
| Gravity Gun (swap) | |
| Grenade | (hold), (hold) |
| Pheropods | (hold), |
Utility
Hold to zoom in and reduce aiming sensitivity.
Use it to aim with additional precision if necessary.
This temporarily enables the gyroscope if it’s toggled off.
Hold to toggle the flashlight.
Click to toggle the gyroscope.
Squad Commands can be found on the right edge of
Click and hold the corresponding icons to
Quicksave or Quickload.
(The requirement to hold is so that you don’t accidentally save or
load your game.)
| Action | Control |
|---|---|
| Aim mode | |
| Gyro Toggle | Click |
| Flashlight Toggle | Hold |
| Quickload/save | |
| Squad send/recall | |
Menu mode
When the mouse cursor is shown, the configuration enters a special mode for menu interaction.
In this mode, the following controls are available:
| Action | Control |
|---|---|
| Mouse | or |
| Click | click, click or |
| Volume Up/Down | up/down |
Feature List
- Weapon Selection Wheel ( + )
- Quickly select specific weapons
- Game slows down when the weapon wheel is held open
- Toggle to last weapon by tapping weapon wheel button
- Aim button
- Zooms in and lowers sensitivity for finer aiming
- Modern sprint button (click)
- Click once while moving to start sprinting, return stick to center position to stop sprinting.
- Direct quick access to Crowbar and Gravity Gun /
- Sequential weapon select ( / )
- Gyroscope aim
- Always on by default
- Can be toggled by clicking
- Always available when holding aim button ()
- Quickload and Quicksave on

- Menu interaction mode
- Triggers automatically when the mouse pointer is displayed, returns to game mode when the mouse is hidden
- and can be used to move the mouse,
click and click for Left Mouse
Button
- Squad Command and Pheropods on
- Custom Steam Input Icons for Half-Life 2’s Weapons
- Derived from touched up game assets
- Lowered rumble intensity
- Excessive rumble may interfere with gyro aim the and default is way over the top
Bugs/Problems
- Achievements are disabled due to enabling cheats
- A cheat-free variant is planned
- Potential weapon/mechanic spoilers from on-screen menus and documentation
- Maybe remove some labels but keep icons?
- click doesn’t uncrouch automatically.
- Need to find how to go directly into uncrouched state after a
toggle_duck.-duckdoesn’t touch the toggled state, so it doesn’t cut it.
- Need to find how to go directly into uncrouched state after a
Possible Improvements
- Enhance icon visibility in weapon wheel
- Blur the background or something when the weapon wheel slowdown is enabled.
mat_hsv 1makes it black and white and could be used for a similar effect, but feels like a bad hack
- Add animation to zoom and slow motion.
- Idea: make a dynamic re-aliasing-based binding that
increments/decrements stuff progressively upon repeated presses
and couple it with a turbo activator. Could be brittle, though.
- Tried and failed. The turbo doesn’t go fast enough to be smooth.
- Idea: make a dynamic re-aliasing-based binding that
increments/decrements stuff progressively upon repeated presses
and couple it with a turbo activator. Could be brittle, though.
- Full gyro off mode (if anyone asks for it)
- Fine tune sensitivities and timings
- Find way to hide spoilers until needed
- No way to save state after changing to/from menu mode, though…
- Proper Steam Input integration or gameside weapon wheel
implementation would be best, but it’d require a mod or an
update from Valve
- Maybe Half-Life 2: Update would accept to include such a feature?
- Some features require cheats => find alternatives or make those
easily optional. An alternate no-cheat cfg file could be easy.
- Made it tunable in Section 5 of `gyro_revolution.cfg`
- Sounds aren’t distorted when setting host_timescale for the slowdown effect. See if there’s any way to do this.
- Add support for HL2: Update and MMOD
- Fully test with Episode 1 & 2
- Port to Steam Controller
- Port to Half-Life 1, Half-Life 1: Source and other similar Source
games.
- Let me know if you have any requests!
Changelog
v1.0-beta
- Initial public release
v1.1
- Tweak trigger sensitivities
- Rearrange touchpad menus
- Fix Windows compatibility
- Fix sprint not resetting because Windows HL2 doesn’t respond to KP_SLASH binding with some keyboard layouts
- Fix OPTIONS not being bound (which was workaround for double input on Linux caused by the outdated SDL shipped with game)
- Add fast forward button
- Make tuning some parameters in `gyro_revolutio.cfg` easier
- Add versioning information to `gyro_revolution.cfg`
- Add warning about SDL on Linux
v1.1.1
This version only affected the cfg file and guide.
- Immediately apply changes made to sensitivity and FoV tunables
upon (re)loading
gyro_revolution.cfg - Fix outdated configuration link in the detailed installation. It
was still pointing to v1.0 by mistake.
- Thank you to Mister Man for making me aware of the problem in the YouTube comments of one of my videos!
- Add instructions on using this configuration with the Half-Life 2 Episodes
- This hasn’t been thoroughly tested as of this writing. It’s a
direct reuse of the work done for Half-Life 2. The only changes
were the controller configuration URLs and the location of the
cfgdirectory.
- This hasn’t been thoroughly tested as of this writing. It’s a
direct reuse of the work done for Half-Life 2. The only changes
were the controller configuration URLs and the location of the
- Add contact information.
Acknowledgments
- The awesome guys at THOSE AWESOME GUYS for their free controller glyph pack
- The r/SteamController community
- Testing/debugging
Contact
You can find me at the following places (sorted by reliability):
- YouTube channel
- Email
- Click “view email address” on the YouTube about page
- GitHub
- Discord: Major Gnuisance#7251
- Twitter: @MajorGnuisance